Art of Acrylic Designs
Acrylic — also known as Plexiglas, Perspex, or PMMA — is one of the most rewarding materials to work with in fabrication. It is rigid yet lightweight, available in dozens of vivid colors and finishes, and responds beautifully to laser cutting, engraving, and polishing. Whether you are a hobbyist building your first illuminated sign or a product designer crafting refined display pieces, understanding how to work with acrylic unlocks a world of creative potential.
Choosing the Right Type of Acrylic
Not all acrylic is created equal. The two main categories — cast and extruded — behave very differently under a laser. Cast acrylic produces a frosted, matte finish when engraved, which creates beautiful contrast against the polished surface. Extruded acrylic, while less expensive, trends to produce a clear engraved finish that is harder to see. For engraving projects, always choose cast. For pure cutting work where engraving is not required, extruded is perfectly adequate and more budget-friendly.
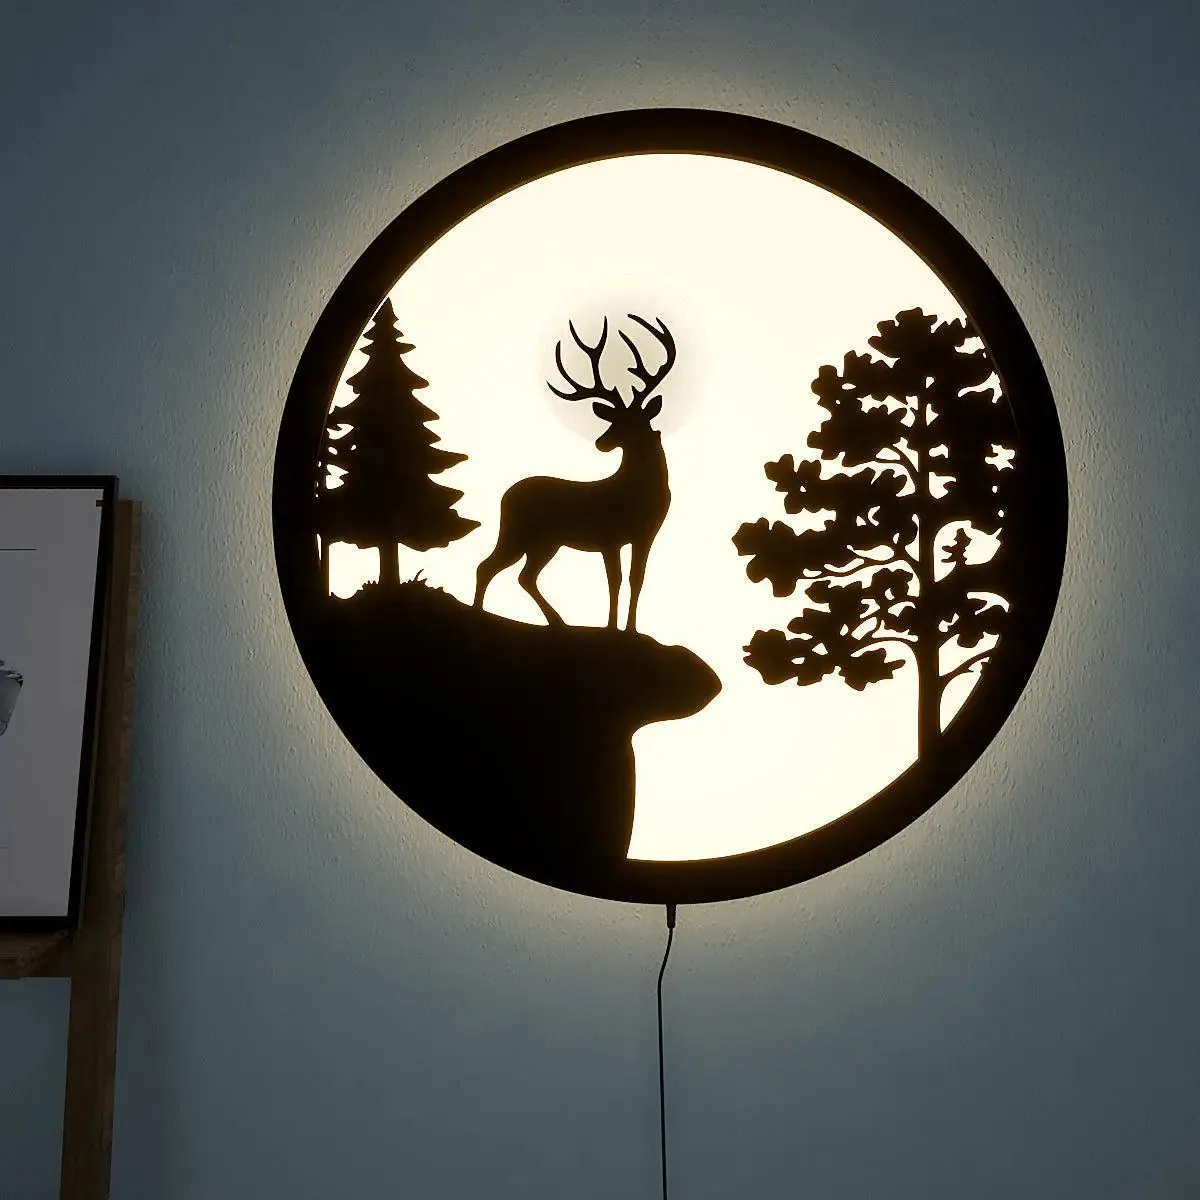
Acrylic also comes in transparent, translucent, opaque, mirrored, fluorescent, and glitter varieties. Fluorescent and edge-lit acrylic are especially popular for LED signage because they channel light along the sheet and glow brilliantly at engraved areas.
Laser Cutting: Getting a Flawless Edge
The hallmark of quality acrylic work is a perfectly polished, flame-clear edge straight off the laser — no sanding required. Achieving this consistently comes down to a few variables:
- Speed and power balance: Too much power with too little speed causes melting and bubbling along the edge. Run test cuts on scrap first and find the sweet spot where the cut is clean and the edge is glossy.
- Air assist: A strong air assist blows combustion gases away from the cut zone, preventing the edge from re-melting and keeping the optics clean.
- Leave the protective film on: Always cut with the factory protective film intact. It prevents surface scratches and keeps residue off the face. Peel it only after the job is complete.
Engraving Techniques for Depth and Texture
Engraving acrylic opens up a different set of creative possibilities. By controlling engraving depth and density, you can create subtle surface textures, photorealistic portraits, or bold graphic elements. One of the most effective tricks is to engrave from the back of transparent or colored acrylic. This leaves the smooth, unscratched factory surface facing the viewer, while the engraved texture is visible through the material — producing a refined, almost three-dimensional look.
Vary the DPI of your engrave pass for different effects. A lower DPI creates a lined texture with visible scan lines, while a high DPI produces a smooth, solid frost. Both have their place depending on the desired aesthetic. For photographic images, a dithered grayscale engrave at medium DPI tends to produce the most naturalistic result.
“Engrave from the back of clear acrylic — the frosted detail glows through a flawless front surface.

Bending and Forming Acrylic
Acrylic becomes pliable when heated to around 160°C (320°F), making it easy to bend into curves, boxes, and complex forms. A strip heater — essentially a heated wire element — allows precise line bends with sharp, clean angles. Laser-score a light line along the intended bend axis first: this guides the fold and ensures it falls exactly where intended. For curved forms, a heat gun and a simple jig or mold will produce smooth, consistent arcs.
Allow the acrylic to cool fully in position before removing it from the jig. Rushing this step results in springback and warped angles. Patience here makes the difference between a professional finished piece and a reject.
Finishing: Polishing, Cementing & Painting
The final stage of any acrylic project is finishing, and it can dramatically elevate the result. Edges that were not flame-polished by the laser can be brought to a high shine using progressively finer sandpaper (up to 2000 grit) followed by a plastic polish compound. For bonding acrylic pieces together, solvent cement such as Weld-On creates a molecular bond that is virtually invisible when done cleanly — far superior to glue for transparent assemblies.
For painted acrylic, spray paint onto the back of transparent sheets for a smooth, protected finish visible through the front. This technique is widely used in retail signage and custom lighting panels. The result looks far more polished than painting the front surface, where brush marks and imperfections are exposed.
Conclusion
Acrylic is a material that rewards experimentation. Each project teaches you something new about how light interacts with color, how heat transforms shape, and how precision produces beauty. Start with the fundamentals, test relentlessly on scrap, and the results will speak for themselves.